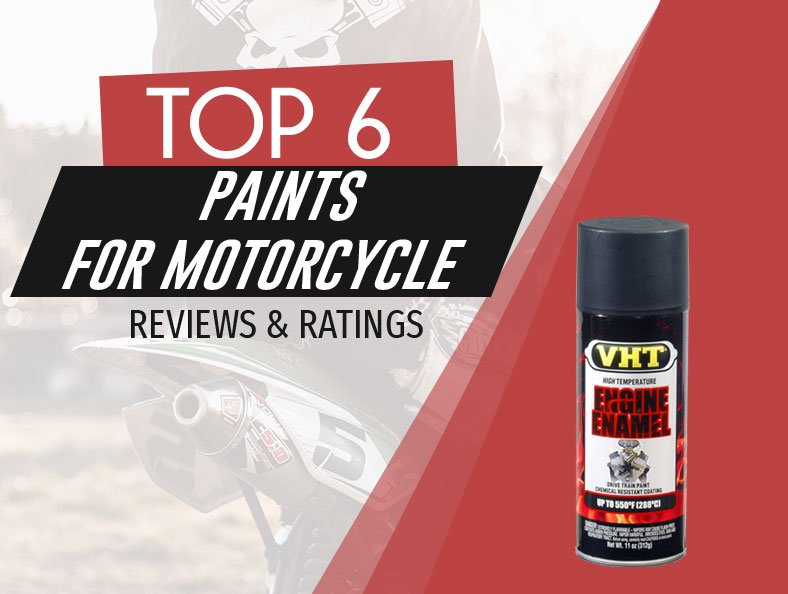
6 Top Rated Motorcycle Paints
Road Racerz is proudly supported by our readers. Products purchased through links on our site may provide us a commission. Learn More
A fresh coat of paint can make your motorcycle look brand new. It’s an ideal way of reviving your bike and giving it a new life, especially if you want to change the color altogether.
However, having your motorcycle painted is sometimes expensive. The price gets pretty high, depending on the motorcycle you ride and the color you’re interested in.
Luckily, this is something you can do by yourself. All you need is a little time, the right paint for your motorcycle, and a few tools and accessories.
Continue reading as we discuss the best paint and how to choose one for your bike.
6 Highest Rated Motorcycle Paint Reviews
| PRODUCT | FEATURES | |
|---|---|---|
VHT  | VHT Features: Satin finish, dries in 30 minutes Color: Satin Black, Flat Black, Hot Pink, Ford Green, Ford Blue... Temperature resistance: up to 500 degrees | Check Price |
Dupli-Color  | Dupli-Color Features: Resistant to oils, no peeling or cracking Color: Gloss Black, Clear, Aluminium, Ford Green, General Motors Blue... Temperature resistance: up to 500 degrees | Check Price |
Rust-Oleum  | Rust-Oleum Features: Any-angle spray, stops rust Color: Flat Black Temperature resistance: up to 2000°F | Check Price |
VHT Paint 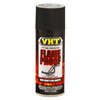 | VHT Paint Features: Suitable for hot parts, durable ceramic coat Color: Black Temperature resistance: 1300°F-2000°F | Check Price |
Design Engineering 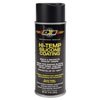 | Design Engineering Features: Prolongs the life of the surface, resistant to abrasion and heat Color: Black Temperature resistance: up to 1500 degrees | Check Price |
PJ1 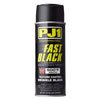 | PJ1 Features: Resistant to scratching, easy to clean with soap Color: Black Temperature resistance: up to 500F | Check Price |
VHT – Satin Black
This satin black is one of the best choices if you want to achieve a fresh look. It looks excellent on motorcycles that are already black, although you can use it to cover other colors.
It has a satin finish and excellent durability, so it’s unlikely to chip or peel after a while. It’s resistant to chemicals, UV rays, and weather elements.
Plus, it won’t crack if applied to hot areas of your motorcycle because it’s highly resistant to heat. It can endure temperatures that are as high as 550°F.
It’s best if you apply primer color paint first before applying this VHT coat. You should also follow it with a clear coat to protect the paint.

This 11 oz. bottle is easy to use and safe to store anywhere in your garage.
PROS
- Satin finish
- Resistant to heat and corrosion
- It dries in 30 minutes
CONS
- It requires a top coat
Dupli-Color – Ceramic Gloss
You might want to check this Dupli-Color ceramic gloss if you’re looking for a durable and glossy finish. It’s a quality-made paint that resists temperatures, weather, corrosion, and frequent use.
This one is highly resistant to temperature, so you can use it on all parts of your motorcycle. It endures temperatures as high as 500°F. Also, it takes only 30 minutes to dry so that you can touch it without damaging the finish.
It features a durable ceramic formulation that gives it a glossy finish and a durable coat. It comes in a spray bottle with an EZ touch nozzle for easier application.

Its bottle and easy-to-use formulation make this one ideal for people who don’t have as much experience. It acts like any spray, so you probably won’t struggle using it.
PROS
- Resistant to oils
- No peeling or cracking
- Easy to apply
CONS
- The shades are a bit off
Rust-Oleum – Flat Black
Rust-Oleum is a flat black color that will cover any damage in your paint finish. It’s the blackest black, easy to apply, and resistant to heat and oils.
It’s a good choice for parts exposed to temperatures that go up to 2000°F. This means you can paint manifolds, exhaust, headers, and other hot parts.
Another thing worth noting is that this one is resistant to corrosion and rust. It’s a rust preventative formula that resists gas, oil, grease, and weather elements. It also stands against humidity and salt.
The paint comes in a spray bottle that works under any angle. It dries in 30 minutes, after which you can touch the finish. However, you should let it dry for at least 24 hours before riding.

It provides a long-lasting finish that doesn’t peel or crack.
PROS
- Any-angle spray
- Heat-resistant
- It stops rust
CONS
- The color might come off on your hands
VHT Paint – Flameproof
This VHT paint is flameproof that can renew the look of your bike. It also acts as a protective coat and can extend the life of the surface.
It’s resistant to high temperatures ranging from 1300°F to 2000°F. This means you can apply it to parts that are near the hottest areas of your motorcycle.
This one is quite popular in the automotive and aerospace industry. It’s a good choice for exhaust systems, inside heads, headers, and piston domes.
One thing to keep in mind is that it requires a curing time. The instructions are included in the back of the spray bottle, so make sure to read them before applying it.

The good thing is that curing time can be done on and off vehicles, depending on what you find convenient.
PROS
- Suitable for hot parts
- Durable ceramic coat
- Easy to apply
CONS
- Requires 24h to dry even after curing
Design Engineering – Silicone Coating
Design Engineering silicone coating is among the best choices if you’re looking for lasting protection. It’s meant for hot surfaces as it stands against temperatures as high as 1500°F.
It’s designed for hot parts, so it’s safe to apply to exhaust headers, engine blocks, pipes, and other similar areas. You can apply it to other parts that require coating.
This one penetrates and seals parts to protect and prolong the life of each area it’s applied to. Apart from being heat-resistant, it’s also resistant to oils and other liquids.

Design Engineering silicone coating protects your bike from abrasions and rust. It’s resistant to road grime, so it’s unlikely to scratch even after a prolonged period.
On top of that, you can use it on other vehicles, ovens, and grills.
PROS
- Prolongs the life of the surface
- It seals and protects
- Resistant to abrasion and heat
CONS
- Tricky to clean
PJ1 – Wrinkle Black
This PJ1 is a wrinkle black finish developed for all parts of your motorcycles, including the cylinders, and engine cases. It gives you a durable wrinkly texture coating that you can both feel and see.
The best thing about this one is that it’s easy to apply. It comes in a spray bottle that you can use at any angle, which is ideal for some hard-to-reach parts.
Another thing worth noting is its durability. It’s designed to resist scratching and chipping, so it can stand against road grime, weather elements, and UV rays.
Also, the finish is easy to clean with just soap and water. It can withstand temperature as high as 500°F and has brief instructions in the back of the bottle.

Make sure to heat the area evenly at a low temperature before applying the paint.
PROS
- Durable texture
- Easy to clean with soap
- Resistant to scratching
CONS
- Some spots might not wrinkle

What to Consider in Buying a Motorcycle Paint
Coverage
Think about the area you have to cover and how much paint you need for the task. This is important because you want to get enough paint to complete the job right away.
Another thing you should think about is the coverage of the paint you like. Some are more opaque than others, in which case you need more spray bottles to cover the area.
On the other hand, some cover the area on an initial pass. These require only one coat and are typically more cost-efficient if you don’t like building the color with a more opaque shade.
More Reading: Painting Motorcycle Helmets – Getting the Job Done Right
Color depth
Color depth is something you should think about before buying any particular paint. Different formulations provide different results, which is exactly why this is critical.
Look for a product that gives you a rich, deep color that matches what you’re looking for. Keep in mind that some might achieve that rich color after a few coats, but that would require you to buy several bottles more.
The best way to figure out the color depth is to read customer reviews. These reviews are typically packed with useful information on the color depth and more.
Formulation
As we said, there are many different formulations on the market. Each type gives you a unique finish and a coat that you might not achieve with universal paint.
Some formulations provide a matte finish while others are more glossy and shiny. You can also choose between sleek and wrinkly coats, depending on your needs and preferences.
Also, some formulas require priming, while others don’t. Nearly every type requires a top coat as well as a curing time of at least two hours.
Another thing to pay attention to is how the formula endures heat since not every product can stand against 2000°F.
Longevity
You should always think about how long-lasting the paint is. You want the most long-lasting option for your motorcycle, especially if you’re looking for one to apply to hot parts.
Hot areas might melt the paint or cause it to flake off after a short period. For this reason, you should look for paint specifically made for the surface you want to apply it to.
The best paint is typically pretty long-lasting. It’s resistant to abrasion, UV rays, rust, oils, road grime, and pretty much anything else that your bike comes across.
Ease of Cleaning
As you probably noticed from our reviews, some paint is rather tricky to clean. This usually depends on the formulation and the type of finish it provides.
Make sure to consider how easy it is to clean before you choose any particular product. Everyone’s bike gets dirty at times, and the last thing you want is to struggle to remove that dirt.
Shiny coats are easier to clean than wrinkle and matte ones, although this sometimes depends on the overall quality of paint. In most cases, these products allow you to clean your motorcycle as you did before.
Price
You should always consider the price of the paint you’re interested in before buying it. Think about the bottle size and whether you’re okay with how much you’re getting for the price.
More Reading: Motorcycle Paint Jobs Costs for Custom and DIY Options
Keep in mind that you’ll probably need more than just one bottle to cover your entire motorcycle. This causes the cost to build up, depending on how many bottles you need.
As always, make sure to place other factors before the price. Determine the budget you’re comfortable with and try to find the best factor that fits within the price range.
How to Paint a Motorcycle
Preparing Your Painting Area
You should first prepare the area you’ll work in so that you don’t waste any time looking for tools and accessories. Place some plastic or nylon over the walls to protect them in case some paint splashes around.
You might also want to put some plastic on the floor. If not, you can lay old newspaper sheets or whatever else you don’t mind getting paint on.
Place some fans near the windows and make sure that the room is well-ventilated. Gather your paint, cloths, and everything else you might need.
Preparing Your Motorcycle
Check the bike’s oil and fuel tanks before you start painting to ensure no leakage could ruin your paint.
Sandblast the metal parts to remove all the old paint from the area. It’s okay if you don’t have a sandblaster since you can use sandpaper as well. Still, this might take a bit longer.
Once you finish sandblasting, you should wipe down all the parts using a non-oil degreaser. This way, you remove residue and ensure a clear surface.
Apply some filler to the low spots and sand the area with 80-grit sandpaper once it dries. You should apply the primer once everything is nice and smooth.
Painting Your Motorcycle
Take some time to read the instructions provided by the manufacturer before you start painting. Apply the first coat and let it dry before using 600-grit sandpaper to wet-sand.
Continue sanding until you smooth the surface out, removing all the ridges that may have appeared. Go on to paint the graphics if you want.
You might want to go over the surface again if you don’t like how the paint came out. If that’s the case, apply the second coat before sanding it once again.
Finish the process using a clear coat. Let it dry for at least 24 hours before sanding it.

Other Tips
Polishing
The best way to polish your motorcycle is to use a variable speed polisher with a buffing pad. Finding the right polishing compound shouldn’t be too complicated because nearly every paint store has some to recommend.
The polishing process is rather simple as well, although you can check some online tutorials to be sure.
Coating
Applying a clear coat across the paint of your choice is quite critical. You might even want to apply two coats for added protection, especially if you have some graphics going on.
Wet-sand each coat with 600-grit sandpaper. Once you apply the last coat, you should sand it with both 600-grit and 1500-grit sandpaper.
Safety Precautions
Safety precautions are essential for your safety and that of others around you. It’s something you should think before painting because these products are typically highly toxic and flammable.
For this reason, you might want to paint your bike outside and have a water hose near the area.
Painting Tools
You don’t need much to paint your motorcycle, but you do need a few tools. In most cases, you’ll need at least two paint guns and an air compressor.
The first paint gun is meant for your primer while the other is for the base and clear coats. Make sure to have a regulator with a water trap and an air hose.
Frequently Asked Questions
What is the best paint for motorcycle tanks?
The products we review are among the most popular on the market. These are easy to use and durable, which means you’re likely to go wrong with either one.
However, most people prefer Dupli-Color, claiming it’s the top option. We suggest you take this with a grain of salt and test it for yourself.
Is spray paint better for painting a motorcycle?
Spray paint is better for achieving an even coat. It’s also easier to apply, especially when it comes to hard-to-reach areas of your motorcycle.
Because it’s easier to apply, it’s also better for people who don’t have as much experience in painting motorcycles.
How to paint plastic motorcycle parts with spray cans?
You need to prepare your tools and accessories as well as your motorcycle before starting the process. Apply a primer and a base coat before sanding it all, as explained in the guide below.
Apply as many coats as you have to, always sanding each of them before applying another.
Conclusion
Hopefully, we helped you decide on the best paint for your motorcycle. We hope to have helped you understand the process of painting and how to do it on your own.
The trick is finding the best products to work with, following the steps we explained in our guide. Take your time and read the instructions provided by the manufacturer of the paint you choose.
Consider your needs and preferences in terms of heat resistance and the type of finish. Make sure to test the paint on a remote area of your motorcycle before applying it all over.
Additional Resources


