
The next thing you want to do is remove the wheel that you’ve lifted. If you have an owner’s manual, this is a good time to refer to it for all the specific details. If not, don’t worry. The key is to lift the bike and remove the axle. This will allow the wheel to come free.
Once you remove the wheel, you should deflate the it. The best way to do this is by removing the valve stem core from the valve stem. Make sure to do this with a specialized tool rather than pliers or anything like that. Your local bike shop probably holds the right kind of tools for this. Anything other than that could potentially damage the valve stem.
You can also draw an arrow at the edge of your rim to mark the direction of the spin. This is optional and is usually recommended to bikers who are doing this for the first time.
The next is breaking the bead that holds the tire and rim together. Use a bench top vise for narrow tires. For larger ones, especially on the rear wheel, you’re probably better off with a special bead breaker.
A bead breaker with integrated spoons is often the best choice through any specialized tool would work. Avoid using a hammer since that could damage the rim before it would loosen.
If it’s not going as easily, you can use a silicone lubricant to help the process. The lubricant allows the tire to slip off the rim much easier. Spray it on each time you expose some of the beads. You could use some Windex for this as well if you don’t have any silicone lubricant at hand.
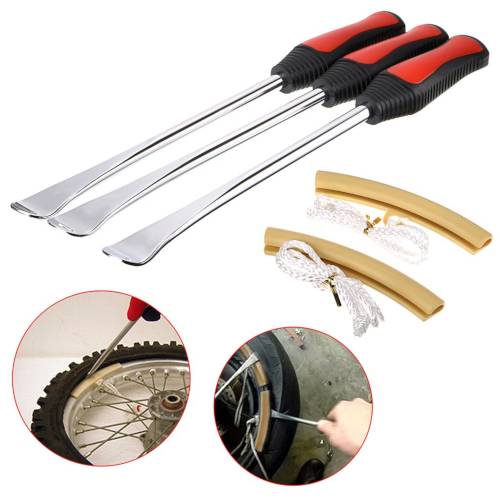
Once you break the bead, you should lever the first side with spoons. Some kits come with small spoons, but we recommend you to use a long spoon. In most cases, it simply makes the job easier. Using the hooked end, slide the spoon between the rim and the tire. Pill the end of the iron towards the center of the rim which should then pull the edge over it.
If you have spoked wheels with tubes, you want to remove them as well. Unbolt the stem from the rim and get the tube out carefully. Do the same process using the same tools and techniques to lever off the other side.
This is an excellent time to look into the rim for any debris and traces of corrosion. Take some time to clean the inside well especially if you have steel rims because those are quite prone to corrosion. If there’s rust, scrub it with a cordless drill and a wire brush. If not, use any method of your choice. Once you’ve cleaned them thoroughly, you should spray on a corrosion inhibitor for some added protection.
Before you go on, you should lubricate the new tire using the same lubricant you used to get the old one out. If not, use Windex again as it does a reasonably good job at making the components slippery enough.
If you have spoked wheels, you should also have a rim strip that covers the spoke nipples. This protects the tube.
Now, place the new wheel, so it goes in the same direction as the one you’ve marked on the rim. Look for a red dot that should be right next to the valve stem. Use this to set it up the right way.
Use your irons to pry the new wheel to the rim. The wall should be between the iron and the rim allowing it to push the tire into the rim. The bead will serve as the fulcrum as you push from the center of the new wheel.
Once it’s in, repeat the process the same way on the other side. When it’s all in and aligned, you want to pump some air using your compressed air pump. Make sure you don’t inflate it fully but only until you hear a pop of the bead.
You can use a small hammer to hit the tire around the bead. This makes it easier for it to slip into the bead but make sure you’re not hitting it too hard.
If you didn’t hear the pop, you should use the Breezer tool to press the bead in and rotate the tire. You shouldn’t keep inflating if you didn’t hear the pop. Instead, let some air out and redo the process. Because it’s not fully inflated, you can still rotate it a little bit.
Once you heard the pop indicating everything is in place, pump some ceramic dust into the tire. Use ceramic dust into the valve for better balance and weight equalization. Though recommended this step is optional but should be done before putting the valve stem back.
Now reinsert the valve stem by using a valve stem tool. Make sure to tighten it into place so nothing can move or slip in any way. Put the wheel back on your bike and inflate it. You might want to check the recommended air pressure if you’re not sure about it.
The process is the same for both tires but make sure to do one at the time. By working on one and then the other, you ensure the precision of your work.