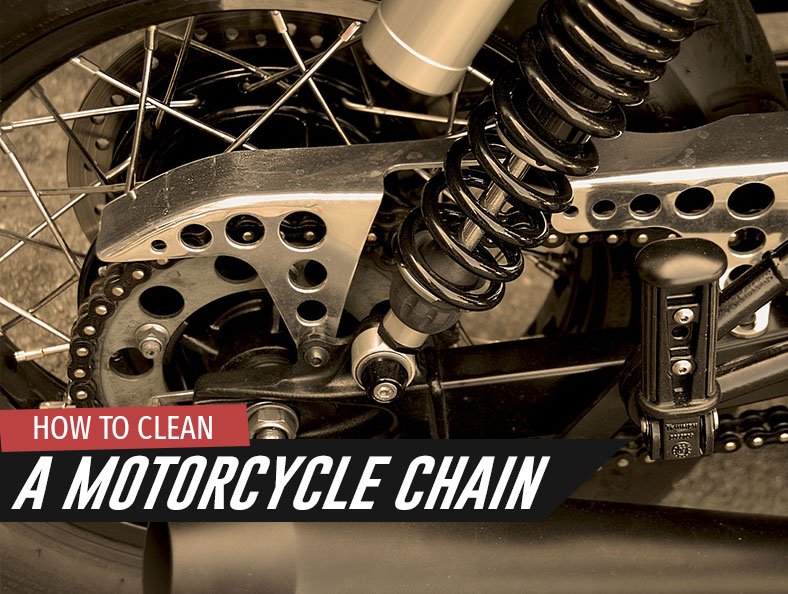
Cleaning a Motorcycle Chain – From Degreasing to Oiling
How often do you clean your motorcycle chain? If you have regular oil changes by a mechanic, chances are they also clean the chain. If you don’t, you should learn how to do it yourself.
Cleaning it with a rag now and then is a good idea, but that’s not enough on the long run. It’s going to get most of the superficial grime out, but it will still be quite dirty.
You should give it a deep clean occasionally to keep it running smoothly. If you’re unsure about how to do it, follow the simple steps below.
Step 1: Position Bike and Gather Materials
Cleaning and lubing are relatively easy as long as you have all the needed materials and tools. If your motorcycle has a center stand or a padlock stand, you already have most of what you need.
What you want is to position the vehicle so the rear wheel and the chain can spin freely. This allows you to apply the cleaner and lube much easier and more efficiently.
If you don’t have these stands, you can use the bike’s kickstand though you’d have to maneuver the vehicle a bit around the driveway. Treat one section and then move the bike a bit or remove the chain altogether.
Step 2: Identify Chain Type
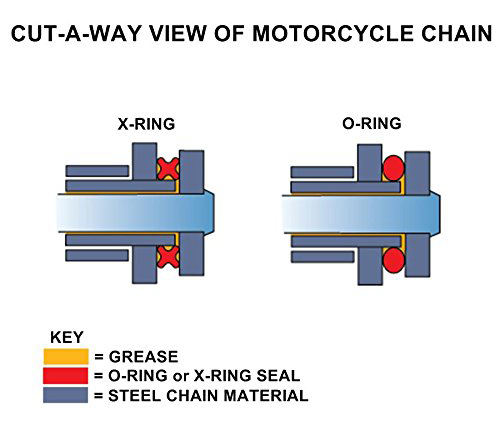
Before you get into the cleaning process, you should identify the type you have. A plain chain has metal-on-metal links without any seals in between. Because of that, these have to be cleaned a bit more aggressively than other chains.
Sealed chains, otherwise known as O-ring, Z-ring, and X-ring chains, have a rubber seal between the outer and inner links. This helps keep the grease inside the pin and to keep the dirt out. It’s an efficient design that improves the overall longevity. It also makes it easier to clean since you don’t have to be as aggressive.
The approach to cleaning is quite similar for both types. Still, knowing what type you have makes it easier for you to get the dirt and grime out.
You can tell the difference just by taking a closer look and inspecting if there’s any space between the links.
Step 3: Look at Sprockets and Motorcycle Chain
Deep cleaning allows you to take a closer look at the chain and make sure of its well-being. Since you’re already tampering with stuff down there, you should take the time to check the general state and condition.
Check if it allows any wiggle room or if the links slide back and forth under tension and compression. If it’s in good condition, it should allow minimal variances.
If you don’t have as much experience with this, you might find it a bit tricky to tell if it’s due for replacement. If that’s the case, you can consult with your shop manual. In the book, you’ll find a specific maximum length of a number of links. If it’s longer than that, it’s worn out.
There are a few other ways of checking its general state. If you tug a link at the rearmost portion of the sprocket, it will pull away from it if it’s worn out. If it’s not, it will hug the sprocket.
Another thing you should check is the master link. It’s that link that’s used to connect the two ends which is why it looks slightly different than others. It’s secured with rivets or a clip, so make sure that it all looks good and secure.
Make sure to check the sprockets as well. Depending on your riding style and how the chain looks, your sprockets will also show wear one way or another. One of the best ways of checking this is by looking for shark fins and sharp teeth. This occurs when the tooth of the sprocket wears out more on the leading edge than the back side.
In most cases, it happens on motorcycles that accelerated hard and decelerated more gently. It tends to also happen with old chains.
The sprocket’s teeth should have flat tips, and anything other than that might call for a replacement. This is important to know because there’s little use of putting a new chain on a sprocket that’s worn out. If you’ve bought a used bike, you should change the two immediately and then continue to replace them simultaneously every next time.
Step 4: Apply Chain Cleaner
Now that you’ve checked everything, you can get to the cleaning process. For this, you can get a specialized cleaner or just kerosene which will work just as well. What you want is something to dissolve and break down the lube and dirt that’s accumulated on the chain.
Work around and make sure to soak everything with the cleaner. Luckily, these cleaners are usually quite affordable while kerosene is also somewhat cheap. So, apply enough of the product since that’s the only way you can clean the dirt effectively.
Step 5: Clean Chain
Once your chain is soaked, you want to get a specialized brush and get cleaning. You don’t have to be overly gentle, so make sure to get to all of that accumulated gunk.
There are many chain brushes on the market, and you can get them at any well-equipped bike shop or a gas station. On top of that, they’re not all the same, so some do a better job than others.
Take your time with this and go over every little part. Once it’s cleaned well, it will take the motorcycle chain lube much easier.
Step 6: Spray Again
What you should do now is go back and respray the chain. Take your spray of choice and re-soak to take off all the grime, dirt and debris. By doing this twice, you’re making sure that there’s no more gunk on that chain since it can do some severe damage.
Step 7: Dry Off
This is a crucial step because it has a direct impact on how the lube will adhere to the chain. Regardless of the lube you go for; it will only stick if the chain is dry. For this reason, take your time to dry it and remove all the cleaning products you’ve applied.
Drying is equally as important as cleaning in this case, so don’t overlook this step. Use any dry cloth to get the excess cleaner.

Step 8: Use Lubricant
Once you’re certain that everything is clean and dry, you can proceed to lubrication. Choose one of many lubes for the job and apply it evenly to all sides.
You can opt for a specialized product or just regular bar oil depending on your needs and preferences. The only difference is that specialized products are more high-quality and are less likely to fling off. Chain lube can make a mess on several other motorcycle components, so it’s essential that it doesn’t fall off and onto other parts.
The way you lube depends on whether you have a plain or sealed chain. With the plain type, you want to put loads of lube and then wipe off the excess. By applying the lubricant continually, you ensure its efficiency and proper function.
If it’s sealed, there’s probably already some lube inside the O-rings. If so, you should apply grease more sparingly since it only serves to protect the outside of the chain from corrosion and rust.
Make sure to wipe off any excess to prevent it from building up. Another thing you can do is apply the lube when the vehicle is still slightly warm after a ride. This allows the product to get through and into the chain.
Step 9: Clean Up Materials and Tools
As we said, the process is relatively simple, and it gets easier each time you do it. Once you’re done, you should go for a ride. Gather your materials, clear up the working area, and go for a ride around the neighborhood.
Frequently Asked Questions
How often should I lube my motorcycle chain?
You should consult with the owner’s manual for all information on maintenance. If for whatever reason, you don’t have the manual, you should do it at least with every oil change.
It wouldn’t be bad to do it more often either, especially if you’re riding off-road and in dirt and wet conditions.
Find out more about how to clean your motorcycle.
Conclusion
It might not seem as important to know this especially if you have a mechanic to check it for you. However, all passionate bikers will tell you that changing the oil as well as cleaning and lubing the chain are some of the things you simply must know.
Luckily, this isn’t complicated at all, and we tried to make it sound as simple as possible too. If you’ve never done it before, make sure to check with your owner’s manual if you have one. Gather all the materials beforehand and make sure to take the time with the process.